
![]()
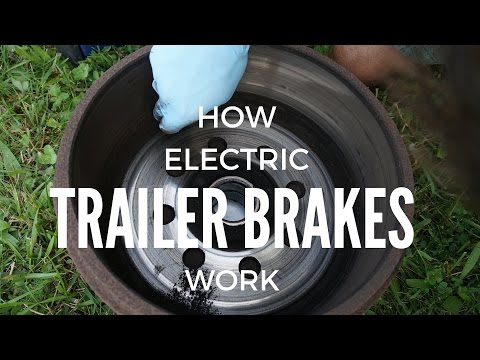
How to Check Electric Brakes on a Trailer?
DISCLAIMER: AS AN AMAZON ASSOCIATE I EARN FROM QUALIFYING PURCHASES. THIS POST CONTAINS AFFILIATE LINKS THAT WILL REWARD ME MONETARILY OR OTHERWISE WHEN YOU USE THEM TO MAKE QUALIFYING PURCHASES. FOR MORE INFORMATION, PLEASE READ MY EARNINGS DISCLAIMER. |
Checking electric brakes on the trailer commonly starts with checking the actual brake controller for faults. If nothing is wrong with your brake controller, you will need to look for wiring problems and shorts within the brake magnets themselves.
Whether you are towing a heavy load or driving up and down dangerous mountain roads, you really need to have good, reliable brakes. If you suspect some kind of brake problem, clear it up RIGHT AWAY, before you get on the road and expect them to work the way they are supposed to!
Your problem could be as simple as replacing a worn-out brake magnet or as hard as getting rid of frayed wires and rewiring the whole thing. Emergencies happen and need to be taken care of, but you should always do preventive maintenance on your brakes (usually once a year or 12K miles), in order not to be stuck in a situation like that.
In this article I will go over:
- How to check your brake controller.
- How to check your brakes with a multimeter and brakeforce meter.
- How to test your trailer’s plug.
- Some visuals of wear and tear.
- The common reasons for shorts.
First of all, let’s take a look at how our trailer’s brakes work:
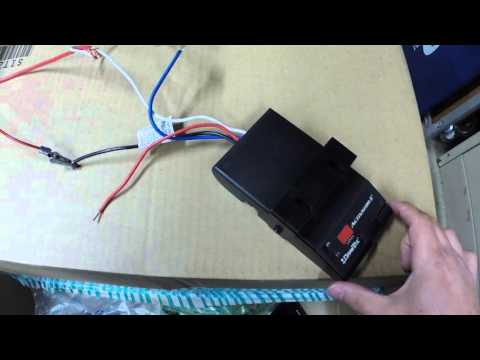
How to test an electric trailer brake controller
Now, let’s take a look at your Electronic Brake Control Panel, and if you have one of the models with a screen (paid link), you will be notified of a problem:

The controller of a trailer’s electrical brake system is a device that feeds the current to your electric brakes. When the brake pedal in your tow vehicle is being pressed, the electromagnets in the brakes themselves get activated and your trailer stops.
This magnetic action of the brake controller could be checked in the following ways:
1. Compass test
Simple, primitive, but useful! Not sure if you have a compass handy, (I do, and I don’t even know why), but here is a simple test for you.
Use the controller to apply power to the brakes (you may require a friendly face to assist you with this task) and put your compass near the brake itself. The compass is supposed to spin if it doesn’t, your brakes are not getting needed electricity in order to work.
If the test failed and the compass is not spinning, checking wires and connections for damages is recommended. Even though this test is kind of fun, not many people own a compass these days, so if you have a screwdriver or a wrench handy, I have an even simpler test for you!
2. Wrench test
Metallic objects are supposed to stick once the electromagnetic field is activated. You can also notice the amount of force applied if your wrench (or another metal object) is sticking well or so-so.
Once you activate your brakes via the controller, if your wrench sticks to them, that means that they are working fine. If not, once again, your connections and wiring need to be checked.
Here is an example:

3. The light bulb test
A light bulb could also be used to check if everything is fine with your brake controller. Here is a good video on that:
These tests will not give you exact numbers, but you will get an idea of what is happening to your brake controller. In order to do further troubleshooting of your brakes, you may need specialized tools or just take them to the shop.
Here is a nice 5-star electronic brake controller (paid link) sold on Amazon.
Using the brakeforce meter tester
There is also a tool available, called Electric Brake Force Meter. It can simulate your load and let you know how your trailer should be responding once a brake pedal is pressed.
Below is a video of a person troubleshooting his brake problem using this very tool:

If you like, you can also purchase this electric Break Force Meter (paid link) which is conveniently sold on Amazon:

 Testing the plug of your trailer

There could be a problem with getting a good connection between your tow vehicle and a trailer. If there is corrosion or debris inside the pins of your plug, the power may not get to your breaks at all!
Here is how you test your 7-pin trailer plug for faults:

Testing your brake system with the trailer connected
If everything seems fine with your brake controller and you still have a brake problem, there could be some wiring or connection problems. You can test the connection between the brakes and the brake controller with a multimeter.
When figuring out how much power your brakes require, you will need to know the size of the brakes and how many of them you have. It is common for a trailer to have two brakes (one for each axle). If you have more than one axle, add your brakes accordingly.
You will need a fully charged 12-volt battery for this test and knowledge of basic 7-pin trailer plug configuration:

Connect your blue wire (which is the one that controls brakes) to the multimeter with an ammeter setting between the brake controller and trailer connector. You should be getting at maximum:
Brake diameter 10-12″
- 7.5-8.2 amps with 2 brakes
- 15.0-16.3 amps with 4 Brakes
- 22.6-24.5 amp usage with 6 brakes.
Brake diameter 7″
- 6.3-6.8 amps with 2 brakes
- 12.6-13.7 amps with 4 Brakes
- 19.0-20.6 amp usage with 6 brakes.
If your reading is more (or less) than the above numbers, you should check individual brakes for problems. Make sure that this time your trailer is NOT connected:
- Test #1. Put your multimeter on an ammeter setting and connect it between the positive terminal of a 12-volt battery (positive lead) and any of the brake magnet wires (doesn’t matter which one). The second magnet wire should be connected to the negative terminal of the battery. If your reading is anywhere below or above 3.2-4.0 amps for 10-12″ brake magnets or 3.0-3.2 amps for 7″ brake magnets, replace your brake magnet.
- Test #2. Put your multimeter (negative lead) in between any of the brake magnet wires and the positive terminal of the battery. Touch the negative terminal of the battery with the base of the brake magnet, and if you get ANY kind of amperage reading on the multimeter, then your brake has an internal short. In this case, also, the brake magnet needs to be replaced.
If your brakes don’t pass any of these tests, start looking for loose wires and corroded connections. Information reference here.
Feel free to save the infoPin below for your future Reference :
Visual check for general wear and tear
This is what a normal brake magnet looks like:

The wear and tear of the brake magnets themselves could be an issue. Here are some examples of bad wear and tear:


If the wires are showing through, it is considered to be “extreme or excessive wear and tear”:

Checking for wiring shorts
Frayed or damaged wiring is also a big issue, due to the wire placement within the axle itself. If you get an indication on the brake controller screen “Output Shorted”, start looking at wiring problems within your axle:
** Warning! Working with electricity and wires is EXTREMELY dangerous and if you don’t know what you are doing, get professional assistance.
** Important! This information is NOT a replacement for regular trailer inspections which are required by law.

You can also search our database:
Attention! This article is for informational purposes ONLY and is NOT a replacement for professional advice! ALWAYS consult your local specialist for an appropriate solution to your problem. All statements, prices, contact information, recommendations, and reviews contained herein came from sources that we believe to be reliable, but the accuracy or completeness thereof is not guaranteed. Please contact the service provider for complete details and updates.


